Installing Node.js on a Linux machine can be a bit tricky, especially if you’re not familiar with the command line. One of the best ways to do this is by using a tool called NVM (Node Version Manager). NVM makes it easy to install, manage, and switch between different versions of Node.js on your Linux machine. In this blog post, we’ll show you how to use NVM to install Node.js on your Linux machine.
For video version of this blog please check out my video on https://www.youtube.com/watch?v=FaGtH5CDFCk
TL;DR
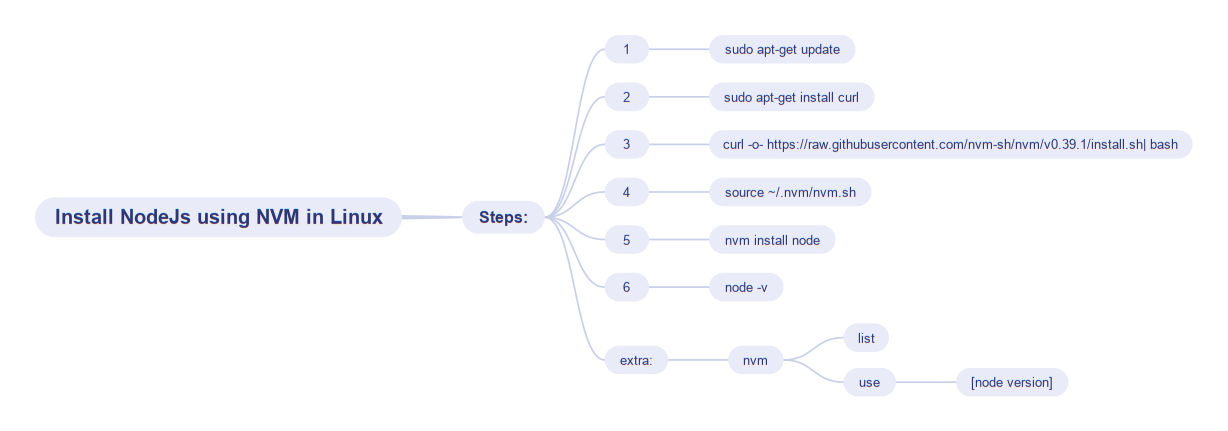
Step 1: Update Your Linux Machine
First, you need to make sure that your Linux machine is up to date. To do this, open a terminal window and run the following command:
sudo apt-get update
Step 3: Install NVM
Once curl is installed, you can use it to install NVM. To do this, run the following command:
curl -o- <https://raw.githubusercontent.com/nvm-sh/nvm/v0.37.2/install.sh> | bash
This command will add the NVM command to your terminal’s command path.
Step 5: Install Node.js
Now that NVM is installed and activated, you can use it to install Node.js. To do this, run the following command:
nvm install node
You can also install specific version of Node.js using nvm install command followed by version number like nvm install 12.18.4
Step 6: Switch Between Node.js Versions
Once you have Node.js installed, you can use NVM to switch between different versions of Node.js. To see a list of all the versions of Node.js you have installed, run the following command:
nvm list
Replace [node version] with the version of Node.js you want to use.
That’s it! You now know how to use NVM to install and manage multiple versions of Node.js on your Linux machine. NVM makes it easy to switch between different versions of Node.js, which is especially useful if you’re working on multiple projects that require different versions of Node.js.
Happy learning/coding 😎